hi! I forgot to post this! I made it back in March, this was my first bookmark of the year, and it includes a drawing I drew myself. At first I wanted to include this band I made, colouring with black and red, but at the end I just didn´t know where to put it, so I´ll use it other time. Here is the photo with the materials I used (note that I forgot to include the red stabilo point88 fineliner adn I didn´t use the red paper...just the white paper)
 |
| some new useful supplies I used for this project(I really needed double sided tape and the red string) |
 |
| here is part of the process, I actually drew it myself, and then cut the pieces of cloth, to stick them with some folded paper between them to make a 3D effect in the sleeves--->see images below |
 |
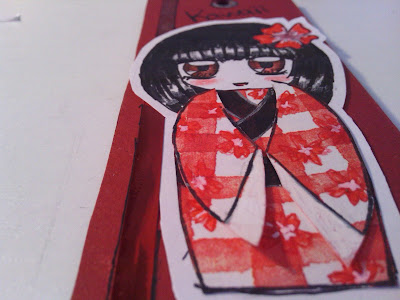
| The materials tha I used for the kimono. As you can see, I drew the flowers using stabilo red fineliner , I added some red glitter gel pen to make it sparky and right in the middle of the flower I used a white gel pen. I drew the black and with white gel pen I made the detail in the sleeves. |
 |
| a close-up of the kimono |
I finished colouring it with pencil colours (faber-castell) and water based markers (edding:black and red, and brown for the eyes).Once finshed colouring I glued all the pieces together and I cut the doll. on another piece of paper I put a red string (the one you usually use for wrapping presents) from the front to the back, I sticked the doll and made a whole with a punch and outlined it with a silver marker (edding 1200), and I outlined again with a black biro pen.
I put the string, made a note, wrote KAWAII &CUTE (even though it would have been great if I actually could have any stamps, but at the moment I have to write it myself)
This is the back. the flowers were cut by me with the same paper I used for the kimono. I outlined the border of both flowers with the stabilo fineliner and with a heart shaped punch I made a 2 hearts to glue in the middle of the flower, the small flower has the heart outlined with a silver colour marker so that the heart looked smaller (well that was the intention). I outlined the whole like the other side, and cut a piece of white paper, writing "Be Happy"and decorating it by hand. I used to hava a really messy handwriting, but I guess know is okay. I cut another bigger piece of red paper and sticked it together. I outlined the border with the red edding marker.
 |
| A CLOSE UP, TO SEE THE 3D EFFECT(WELL IT ISN´T REALLY CLEAR) |
 |
So for this I used scissors(I drew the flowers and cut them afterwards, that´s why some petals look strange)the hearts were made with the paper of a cholate box, do you recognise that pattern? ("La caja roja de Nestlé"yummy)
that´s all, for now!
UFF, THANKS GOD THAT I REMEMBERED HOW I DID THIS...I did this bookmark 3 weeks ago...
NOw I have to study maths , hehe
Thank´s for passing by! please visit MY ART PAGE |


No hay comentarios:
Publicar un comentario